Notice - This website has asked me to notify you that it uses
cookies to store information on your computer, the cookie function is
out of my control as the site is hosted by Blogger (which has Google connections). Most cookies are used
to make a website work and others are used to help improve it by
providing some usage details (e.g. time spent on page, approximate
geographical location etc). I am not an expert on cookies and suggest
that you satisfy yourself that you understand cookies adequately and how
to manage them. If you want to limit the use of cookies you can adjust
your cookie preferences and also delete cookies, some browsers
also allow you to enable secret browsing. I hope this helps you to make
a conscious decision about cookie management.
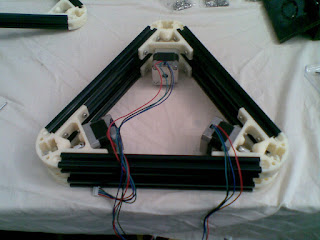
Today was spent building the kit, pictures taken at various points below:
Four stepper motors, one has longer wires for filament feed
First fix stepper motors to bottom brackets
Two per motor
Then fit arms - good idea to invest in ball ended Allen keys for assembling many parts
Assemble top parts into a triangle
Assemble bottom parts into a triangle (slide together at same time)
Fit belt pulleys
Fit hot end contact switch
Fit arms
Assemble roller sets
Fit limit switches to uprights
Fit rollers to arms
Assemble all the bits into a frame with rollers connected to arms
Assemble hot end into carrier
Fit and trim drive belts
Filament feed motor mounting position
Main board and display mounted and connected up
Power and USB connections
Glass bed (covered in what looks like masking tape) held in place with six screws and deeper nuts
Thoughts - generally quite fiddly to build and instructions sometimes lacked detail.
Some screws are only threaded into plastic which could become a weakness over time but they currently feel quite secure. One area of particular concern was the hot end hinge was not free floating against the micro switch, I spent a lot of time working the screws in and out to create a running clearance but with no slop. The adjustment of this seems quite vague too.
The nuts inside rails sometimes turn rather than grip, so they need to be held when tightening the screws, I wedged them with a small Allen key.
The main circuit board and display were easy to wire up and mount but there wasn't much wrap for double insulation, so I taped up the wires with black insulation tape. I decided to mount the filament feed motor on the side of the frame rather than the top as this seemed to give a smoother curve across the whole working range. This may change once tested and may depend on spool position.
Tomorrow the software.


No comments:
Post a Comment